
What is docker?
Docker is one of the most used platforms in the world. With Docker, developers can containerize their application (Back end or front end) by combining the application source code with the operating system and the libraries, required to run the application, so that the containerized image file can be run in any environment. Because of that, developers don’t need to stick to a single cloud platform. If any platform supports docker, then they can easily change the platform when required.
Prerequisites
For this guide, you need a react project. And it’s better to have a simple understanding of things like docker images, and containers. But We’ll be discussing those too.
Another thing is the Docker desktop. This is not a must. You don’t need the docker desktop app to run docker commands. But It’s good to have it.
What is a docker image?
Simply, a docker image is a template that contains the application, and all the dependencies required to run that application on docker. Images are the heaviest contents. Docker images have multiple layers.
Base image - This is the layer that we build from scratch with the docker build command
Parent image - A parent image can be the first layer in a Docker image. It is a reused image that serves as a foundation for all other layers.
Layers - Layers are added to the base image, using code that will enable it to run in a container. Docker’s default status is to show all top-layer images, including repository, tags, and file sizes.
Container layer - A Docker image not only creates a new container, but also a writable or container layer. This layer hosts changes made to the running container and stores newly written and deleted files, as well as changes to existing files
Docker manifest - This part of the Docker image is an additional file. It uses JSON format to describe the image, using information such as image tags and digital signatures.
What is a docker container?
A container is a standard unit of software that packages up code and all its dependencies so the application runs quickly and reliably from one computing environment to another.
docker images become containers when they run on Docker Engine. Available for both Linux and Windows-based applications, containerized software will always run the same, regardless of the infrastructure
Now we have an idea of what we are gonna work on. So let’s begin.
Steps
Step 1 - Create a ReactJS project
This should be an easy task for you. To create a ReactJS project, you just need to run the below command.
npx create-react-app react-docker-training
Step 2 - Create a .dockerignore file
So the next step is to create a .dockerignore file. It’s kinda same as the .gitignore file. The purpose of this is to tell docker to avoid these files when building the docker image.
There are two ways of creating the file. The easiest way is to create it manually and give the name “.dockerignore”
Or you can use the below command to do that
touch .dockerignore
since this is a simple project, we don’t have much to ignore. But one thing we must ignore is the node_modules folder. So let’s add that to the .dockerignore file.
Step 3 - Creating a Dockerfile
To create a docker image from the ReactJS project, we need to tell the docker what to do. In another word, we need to give build instructions. That’s what we are going to put in the Dockerfile.
Just like step one, you can create the file manually, or you can use the below command for that
touch Dockerfile
Let’s add the build instructions now.
As you can see, this is a multi-stage build. In stage 1, we are creating an image using node:17-alpine. In stage 2, we create another image. But this time using the previous image and Nginx.
Nginx is mainly used in production builds. It reduces the size of the image.
Step 4 - Building the docker image
Since we have all the files, let’s go ahead and create an image. You can do this in two ways. If you are using VS Code, there is an extension for docker. Once you installed that, you can just right-click on the Dockerfile and build an image.
But that’s not a good approach. So in this article, I’ll be using docker commands to do that.
Open a terminal in VS Code. And let’s run the below command
docker build -t docker-react-image:1.0 .
docker-react-image is the name of the image. You can give any name you prefer. 1.0 is the tag of the image.
Once the build is completed, let’s run
docker image ls
to list all the images. You should be able to see the newly created image.
Step 5 - Create and run a container with the image
now that we have the image, let’s create a container. So that we can access the app.
To do that, you need to execute the docker run command. In the terminal, execute the command as follows.
docker run -d -p 4000:80 --name docker-react-container docker-react-image:1.0
Let’s talk a bit about this command.
- -d means running container in background and print container ID.
- -p for port mapping. Port mapping is used to access the services running inside a Docker container. We open a host port to give us access to a corresponding open port inside the Docker container. The above command launches an httpd container and maps the host’s port4000 to port 80 inside that container. By default, the httpd server listens on port 80. So now, we can access the application using port 4000 on the host machine
- - -name is for the container name. Here you can use any name you prefer.
- Finally the name of the image that we created earlier. Remember that in the docker run command, the final argument must be the image name. So go ahead and run the command when you are ready. You should get an ID once the container is created.
Step 6 - Running the application
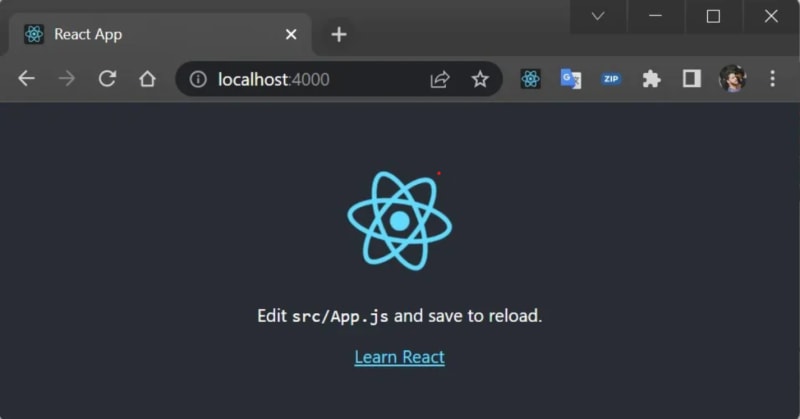
Now we have created an image, also a container using the image. So we should be able to see our application running. Let’s go to localhost:4000 and check.
Bingo. Here we have our React app running on a docker container.


Top comments (9)
Thank you for sharing this amazing tutorial on how to dockerize a React application. Your step-by-step guide was very easy to follow and helped me understand the process better.
docker build -t docker-react-image:1.0 .
How to change this tag value for next build dynamically?
I appreciate the time and effort you put into creating this post. Keep up the great work!
Thank you for your comment.
You can pass the build id or commit hash to the tag value.
Get the current Git commit hash
COMMIT_HASH=$(git rev-parse --short HEAD)Build the Docker image with the commit hash as the tag
docker build -t docker-react-image:$COMMIT_HASH .Note that this is the way you should do when we are using a service like Azure DevOps or GitHub Actions.
I used terminal to run the command since this is basic guide.
Thanks, got it !
I am missing the nginx configuration for URL based routing.
Since this is a basic guide, I haven't included that part. But you can follow the below steps to achieve that.
1) Create an NGINX configuration file (nginx.conf) in the same directory as your Dockerfile.
2) Add below code as the nginx configuration
3) add a new config layer in your dockerfile which copy the file to the /etc/nginx
4) use this new layer and copy build application to the destination and start nginx deamon
This was awesome. I have a couple of friends who talk a lot about using Docker and I never fully understood how it functioned. This has given me a solid foundation to work from, thanks for this!
I'm glad that this gives you an idea of Docker. Keep crushing
Thanks Ayesh - that's very helpful.